
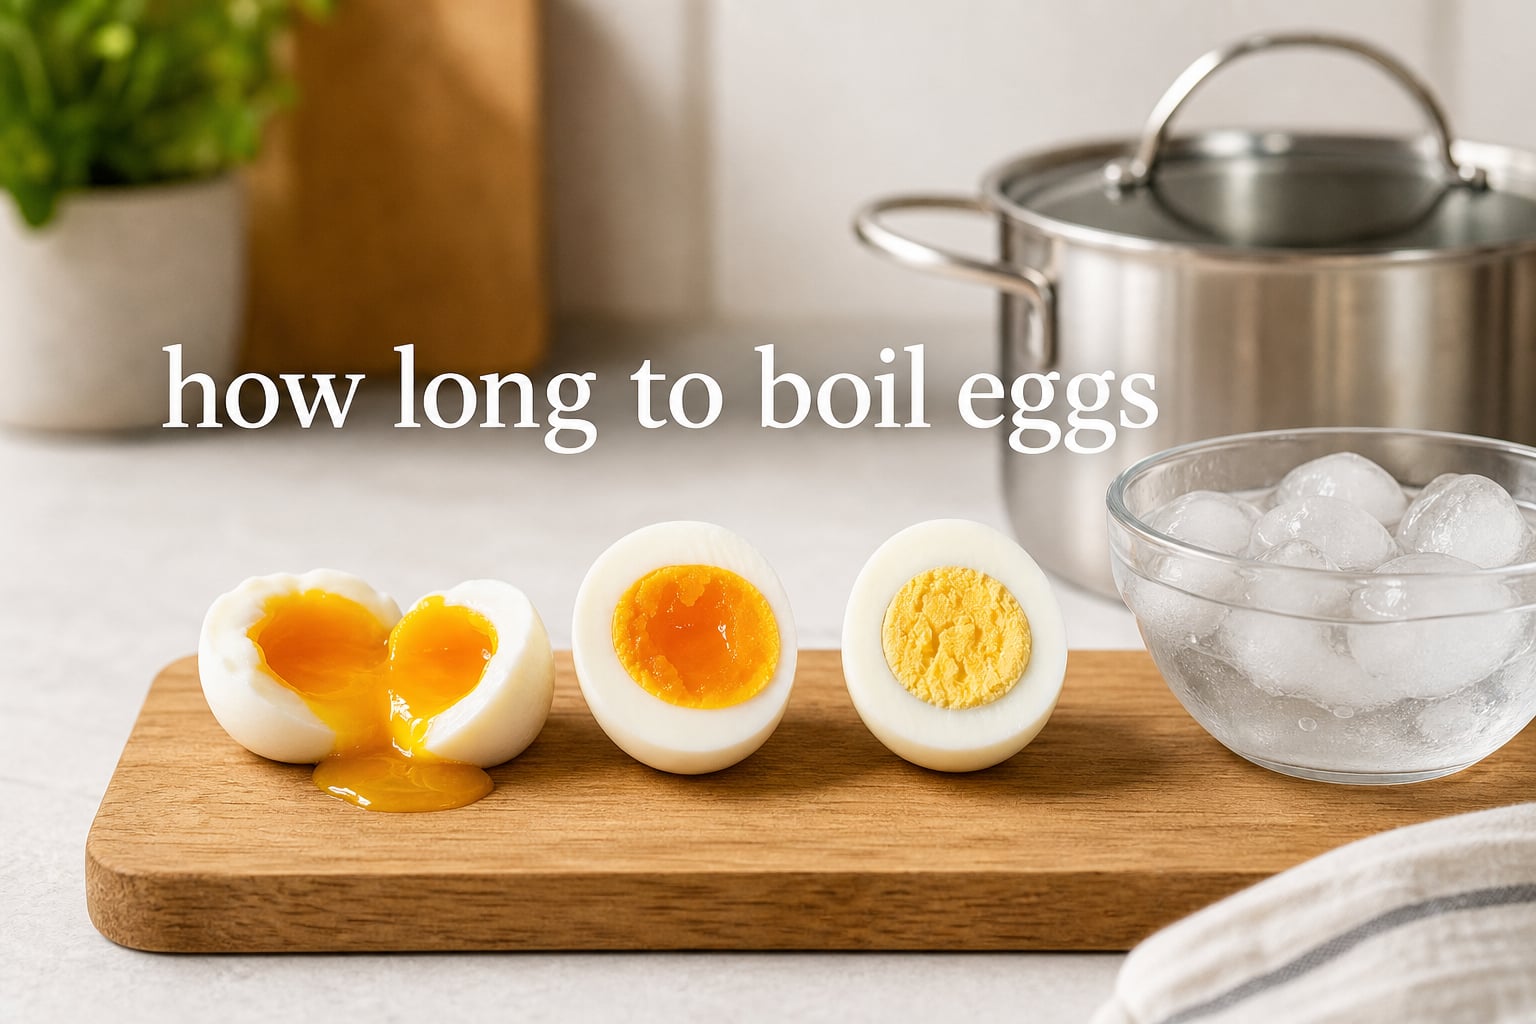
If you have ever stood over the stove wondering exactly how long to boil eggs, you are in good company. Getting the yolk to that perfect jammy, runny, or fully set stage comes down to a difference of one or two minutes, and that small window trips up almost every home cook at some point.
I have tested every timing chart I could find over the past few years, and the results always come back to a simple truth: the boiling water method with a precise timer beats every shortcut. In this guide I will walk you through the exact cooking times for soft, medium, and hard boiled eggs, the step-by-step stovetop method, the ice bath cooling process, and the peeling tricks that Reddit home cooks swear by.
By the end you will know exactly how long to boil eggs for your favourite doneness level, why older eggs peel easier than fresh ones, and how to avoid the grey-green ring that ruins so many devilled egg platters. This guide is updated for 2026, so the timings reflect what is working in kitchens right now.
Table of Contents
Quick Tips for Perfect Boiled Eggs
Before we get into the timing chart, here are the four rules I never break when I boil eggs. Follow these and you will already solve most of the common problems before they start.
Start with boiling water. Lowering eggs into already-boiling water gives you precise control over the cook time, which is the whole point of this guide.
Use eggs that are at least a week old. Older eggs have a slightly larger air pocket inside the shell, which makes them significantly easier to peel after cooking.
Add a teaspoon of baking soda to the water. This raises the pH and loosens the bond between the white and the shell, a trick that comes up again and again in cooking forums.
Ice bath immediately. Plunging eggs into ice water the second the timer goes off stops the cooking process and prevents that grey ring from forming around the yolk.
Keep these in mind as you read through the timing chart and step-by-step method below.
How Long to Boil Eggs (Timing Chart)
This is the section most people come for, so let me give you the quick answer first. How long to boil eggs depends entirely on the yolk doneness you want, and the difference between a runny yolk and a fully hard one is only about six minutes.
These timings assume large eggs straight from the fridge, lowered into water that is at a full rolling boil. Smaller eggs will be done about a minute sooner, and extra-large eggs may need an extra minute.
| Doneness Level | Boiling Time | Yolk Result | Best For |
|---|---|---|---|
| Dippy / Soft Runny | 6 minutes | Liquid, glossy orange yolk | Dipping toast soldiers, ramen bowls |
| Jammy Medium | 7 minutes | Soft, custardy, slightly set centre | Soy-marinated eggs, salad bowls, ramen |
| Soft Boiled | 8 minutes | Soft set but still creamy yolk | Breakfast eggs, avocado toast |
| Medium Hard | 9 to 10 minutes | Mostly set with a touch of softness | Egg salad, sandwiches |
| Hard Boiled | 10 to 12 minutes | Fully set, bright yellow, no grey | Devilled eggs, meal prep, Nicoise salad |
| Very Firm Hard | 12 to 14 minutes | Pale, fully set, easy to slice | Egg slices for salads, Scotch eggs |
The sweet spot for classic hard boiled eggs sits at 10 to 12 minutes. Push past 14 minutes and you start losing quality, with chalky yolks and rubbery whites that nobody enjoys.
For soft boiled eggs with that gorgeous runny centre, 6 minutes is the magic number. If you prefer jammy yolks with a soft custard texture that holds its shape, aim for 7 minutes on the dot.
One thing worth mentioning: the water should be at a gentle rolling boil, not a violent eruption. A calm boil keeps the eggs from bouncing around and cracking against each other or the pan.
Once the timer hits your target, do not walk away. Every extra minute in hot water pushes the egg toward overcooked territory, and the difference between perfect and chalky is smaller than you might think.
Step-by-Step Method: How to Boil Eggs
Here is the exact stovetop method I use every single time, and the one I recommend to anyone who asks how to get consistent results. It works for any doneness level in the timing chart above.
Step 1: Boil the water first
Fill a saucepan with enough water to cover the eggs by at least an inch. Bring it to a full rolling boil over high heat. Starting with boiling water is the key to precise timing, because the cooking clock starts the moment the eggs hit the water.
Step 2: Lower the eggs gently
Use a slotted spoon to lower fridge-cold eggs into the boiling water one at a time. Go slowly to avoid cracking the shells. If you are cooking several eggs, lower them in sequence rather than dropping them all in at once.
Step 3: Reduce to a gentle simmer
Once the eggs are in, turn the heat down slightly so the water settles into a gentle simmer rather than a rolling boil. This prevents the eggs from rattling against the pan and cracking, and it also keeps the whites from turning rubbery.
Step 4: Start the timer
Start your timer the moment the eggs go into the water. Refer to the timing chart above for your target doneness. I keep my phone timer loud and within earshot so I never miss the window.
5: Prepare the ice bath
While the eggs are boiling, fill a bowl with cold water and plenty of ice cubes. You want this ready the second the timer goes off, because the cooling process is just as important as the cooking time.
Step 6: Transfer to the ice bath
When the timer hits your target, use the slotted spoon to lift each egg out and plunge it straight into the ice water. Leave them there for at least 5 minutes, or 10 minutes if you have time. This stops the cooking instantly and shrinks the egg slightly inside the shell, which makes peeling much easier.
Step 7: Peel under running water
Tap the egg gently on the counter to crackle the shell all over, then peel it under a slow stream of cold tap water. The water sneaks between the membrane and the white, helping the shell slide off in clean pieces.
That is the complete process. Once you have done it two or three times, the whole routine takes about 15 minutes from start to clean peels.
Pro Tips and Tricks for Easy Peel, Crack-Free Eggs
This section covers the questions that come up again and again in cooking forums, plus the methods and tricks that most articles skip over. These are the details that turn a decent boiled egg into a perfect one.
The 5-5-5 Method Explained
The 5-5-5 method is a memory trick that has gone viral in home cooking communities. It stands for 5 minutes of boiling, 5 minutes off the heat with the lid on, and 5 minutes in an ice bath. This produces a hard boiled egg with a fully set, bright yolk and tender whites.
The off-heat stage uses residual heat from the water to finish cooking the yolk gently, which reduces the risk of the grey ring. It is a forgiving method for beginners who worry about precise timing.
The Baking Soda Trick
Add half a teaspoon to a teaspoon of baking soda to the boiling water before you lower the eggs in. The alkaline environment raises the pH of the egg white, which stops it from bonding tightly to the inner shell membrane.
This is one of the most consistently recommended peeling hacks on Reddit cooking threads, and in my own testing it genuinely makes a difference, especially with fresher eggs that normally resist peeling.
Why Older Eggs Peel Better
The science here is simple and worth understanding. As eggs age, moisture slowly evaporates through the porous shell and the air pocket inside grows larger. This air gap creates natural separation between the cooked white and the shell membrane.
If you buy eggs specifically for boiling, leave them in the fridge for 7 to 10 days before you cook them. You will save yourself a lot of peeling frustration.
Altitude Adjustments for High Elevation
Water boils at a lower temperature at high altitude, which means eggs take longer to cook. This is a content gap I noticed across most of the major guides, so here is the adjustment table I use.
| Altitude | Extra Cooking Time |
|---|---|
| Sea level to 1,000 ft | No adjustment |
| 1,000 to 3,000 ft | Add 1 minute |
| 3,000 to 5,000 ft | Add 2 minutes |
| 5,000 to 7,000 ft | Add 3 minutes |
| Above 7,000 ft | Add 4 to 5 minutes and test |
If you live in Denver, Calgary, or any high-elevation city, this table will save you from constantly undercooking your yolks.
The Egg Pricker for Crack Prevention
An egg pricker is a small tool that makes a tiny hole in the wide end of the shell where the air pocket sits. This lets expanding air escape during boiling and reduces the chance of cracking. It is not essential, but it is a cheap investment if you boil eggs often.
Common Mistakes and How to Avoid Them
Even with the perfect timing chart, a few classic mistakes can ruin a batch of eggs. Here is what goes wrong most often and how to fix it before it happens.
Green or Grey Ring Around the Yolk
That unappealing grey-green ring is caused by a chemical reaction between sulphur in the white and iron in the yolk. It happens when eggs are overcooked or cooled too slowly. The fix is simple: stick to the timing chart, transfer immediately to an ice bath, and never leave eggs sitting in hot water after the timer goes off.
Eggs Cracking During Boiling
Cracking is usually caused by temperature shock or rough handling. Lowering fridge-cold eggs into boiling water too quickly is the most common culprit. Use a slotted spoon, go slowly, and consider an egg pricker if cracking is a recurring issue.
Rubbery Whites and Chalky Yolks
Both of these come from cooking too long. Whites turn rubbery because the proteins over-coagulate, and yolks go chalky and pale when they are cooked past the firm stage. Set a timer, respect the timing chart, and trust the ice bath to finish the job.
Impossible-to-Peel Eggs
If the shell keeps taking chunks of white with it, you are likely working with very fresh eggs. Buy eggs a week ahead, add baking soda to the water, and peel under cold running water. Older eggs plus the baking soda trick will solve this in nearly every case.
Forgetting the Eggs on the Stove
It sounds obvious, but this is the number one cause of overcooked eggs. Set a timer you can actually hear, and prep the ice bath before you start boiling. Once you have a system in place, it becomes second nature.
FAQ
Is 10 minutes long enough to hard boil an egg?
How long should you boil an egg for?
What is the 5 5 5 rule for eggs?
Do you put eggs in boiling water or cold water first?
Is 20 minutes too long to boil eggs?
What is the perfect time to boil eggs?
Conclusion
Once you commit the timing chart to memory, knowing how long to boil eggs becomes second nature. Six minutes for runny, seven for jammy, eight for soft boiled, ten to twelve for hard boiled, and an ice bath every single time.
Try the method above once or twice and you will never need another guide. Pin this page or bookmark the timing chart so it is ready next time you have a carton of eggs and a hungry kitchen waiting.